WordPress CDN Integration with W3 Total Cache
The BitsNGo Multi CDN can be integrated with WordPress easily by using the W3 Total Cache plugin, here are the steps to integrate:
You can watch this easy, step-by-step video, or read the following detailed guide:
#1. Sing Up: here (FREE)
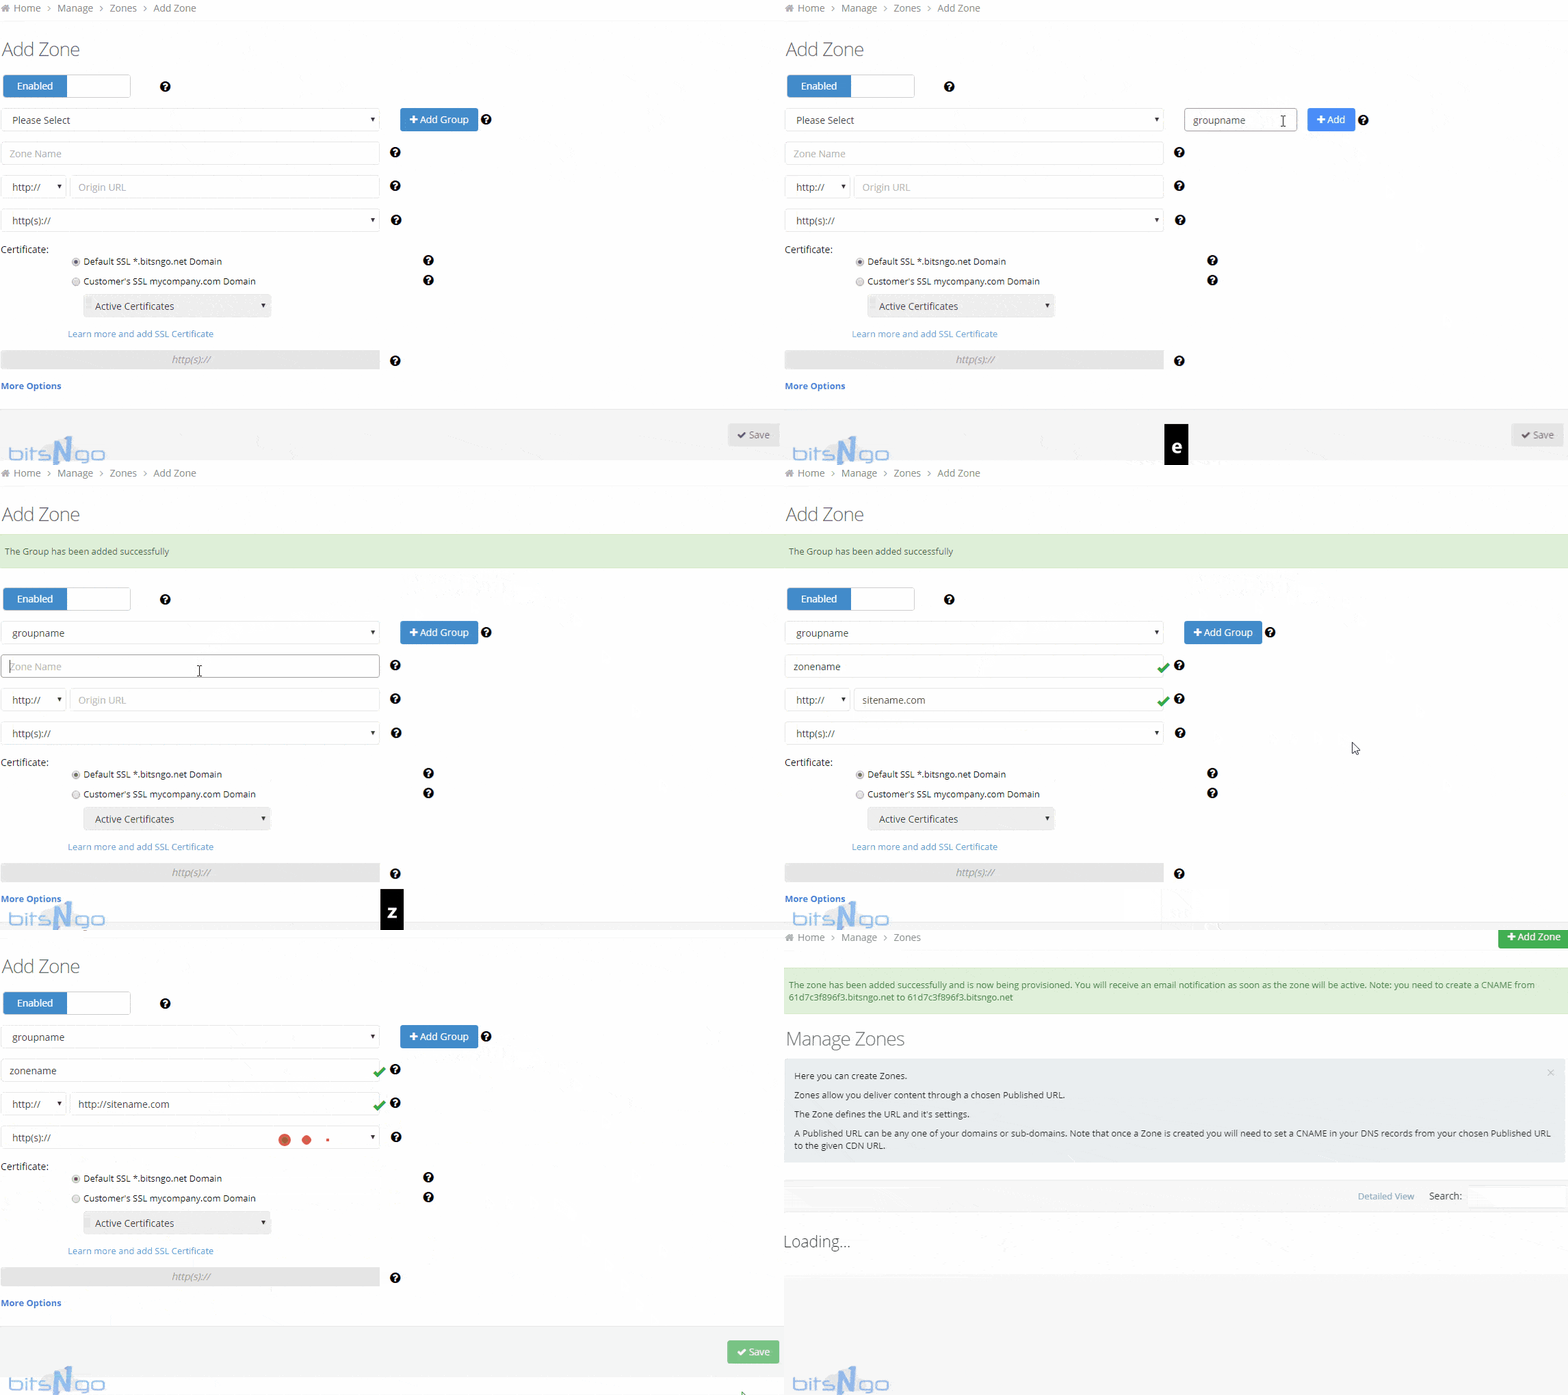
#2. Create a new zone:
1. Click -> here
2. Wait 90m for the zone to be deployed
3. When the zone status is ‘Active’ copy the Published URL

#3. Add a CDN to the W3 Total Cache Plug-in:
1.Login to your WordPress dashboard.
2. In the side menu find the Performance tab and click on it to open the W3 Total Cache main configuration area.
3. Scroll down to the CDN section.

4. Check Enable and select Generic Mirror from CDN type drop down.
5. Click Save all settings as shown in the image.
6. Scroll down to the Configuration section and paste your Published URL (that you’ve copied in Step #2) in the input field that’s labeled: “Replace site’s hostname with”.
Save settings when done. And… you’re all done!

BitsNGo - An innovative Enterprise CDN for Startups & SMBs
This content is brought to you by BitsNGO, a global CDN made for startups and SMBs, powered by tier one infrastructure. BitsNGo is truly global, affordable, demands no commitment and includes 24/7 support. Sign up for a free trial now or Request a Demo
Important:
If by clicking on Deploy you are forwarded to the a page showing: “WordPress Failure Notice: Are you sure you want to do this? Please try again.” Click on Please try again. You should now see a yellow header at the top. Click on the Deploy button.
To verify that the plugin is properly implemented view the page source of your website. If your URL paths to your static files are showing the CNAME or Zone URL then you have successfully integrated the BitsNGo CDN into your website.
